はじめに
VMware vSphere を Azure Arc の管理下に置くためには、Azure Arc Resource Bridge という仕組みを利用して VMware vSphere を Azure Arc に接続する必要があります。docs.microsoft.com に記載されている Resource Bridge をデプロイする手順は、Azure Portal が生成するスクリプトを vCenter と通信できる端末上で実行する形です。詳細は以下の URL の通りです。
クイックスタート: ヘルパー スクリプトを使用して VMware vCenter Server を Azure Arc に接続する
このスクリプトは次の作業を実行します。
- 作業環境の整備
- Resource Bridge のデプロイ
- Resource Bridge への VMware vSphere 用拡張機能のインストール
- カスタムロケーションの作成
- vCenter の接続
スクリプト実行中に求められる各種情報を入力していくことで Azure Arc への接続は完了します。ですが、裏で何が起きているのかが分かりにくいので、構成と作業への理解を深めるために、スクリプトを分解してあえて一つずつ手作業で実行してみました。
作業環境の整備
Resource Bridge をデプロイするためには、64bit 版の Azure CLI が必要なようです。手間を惜しんで MSI 版の Azure CLI(32bit版)で試したところ、次のエラーが出て Resource Bridge のインストールが途中で失敗しました。
cli.azure.cli.core.azclierror: {
"errorCode": "KvaError",
"errorResponse": "Error in reading OVA file: failed to parse ovf: strconv.ParseInt: parsing \"5194121216\": value out of range"
}
az_command_data_logger: {
"errorCode": "KvaError",
"errorResponse": "Error in reading OVA file: failed to parse ovf: strconv.ParseInt: parsing \"5194121216\": value out of range"
}
エラーを回避するために、スクリプトの記載されている通り、インターネット上から Python 3.8 のインストーラをダウンロードしてインストールします。
Invoke-WebRequest -Uri "https://www.python.org/ftp/python/3.8.8/python-3.8.8-amd64.exe" `
  -OutFile ".temp/python-3.8.8-amd64.exe"
$p = Start-Process .\.temp\python-3.8.8-amd64.exe -Wait -PassThru `
  -ArgumentList '/quiet InstallAllUsers=0 PrependPath=1 Include_test=0'
インストール後に、パスの260文字制限を解除します。
Start-Process powershell.exe -verb runas -ArgumentList "Set-ItemProperty `
  -Path HKLM:\SYSTEM\CurrentControlSet\Control\FileSystem -Name LongPathsEnabled -Value 1" -Wait
インストールした Python を利用して Azure CLI をインストールします。
.temp\.env\Scripts\python.exe -m pip install --upgrade pip wheel setuptools >> $logFile
.temp\.env\Scripts\pip install azure-cli==2.36.0 >> $logFile
この手順を踏んでインストールされた Azure CLI は64bit版になります。
> az --version | Select-String "64 bit"

Please let us know how we are doing: https://aka.ms/azureclihats
and let us know if you\'re interested in trying out our newest features: https://aka.ms/CLIUXstudy

Python (Windows) 3.8.8 (tags/v3.8.8:024d805, Feb 19 2021, 13:18:16) [MSC v.1928 64 bit (AMD64)]
最後に venv を実行します。
.temp\.env\Scripts\Activate.ps1Resource Bridge のデプロイ
作業環境が整ったので Resource Bridge をデプロイします。スクリプトでは az arcappliance run vmware というコマンドを実行することで、Resource Bridge のインストールに必要となる createconfig と prepare、deploy、create がまとめて実行されます。ですが、今回は構成と作業への理解を深めるために1つずつ実行して動きを確認します。
az arcappliance createconfig vmware
まずは Resource Bridge をインストールするための設定ファイルを az arcappliance createconfig vmware で作成します。スクリプトに入力すべき情報は、vCenter の資格情報と Resource Bridge を配置するクラスタの情報、Resource Bridge のネットワーク設定です。
なお、 Resource Bridge は、導入時だけでなく導入後も入力された資格情報を利用して vCenter を操作します。また、入力した vCenter のアカウント名は、Azure 上に登録される vCenter のプロパティに保存されます。これらの挙動が望ましくない場合は、必要に応じて Resource Bridge 専用のアカウントを用意するとよいでしょう。今回は初期の管理者アカウントを利用します。
>  az arcappliance createconfig vmware --resource-group arc-validate `
  --name vcsa-home --location eastus
Command group 'arcappliance createconfig' is in preview and under development. Reference and support levels: https://aka.ms/CLI_refstatus
Please enter vCenter FQDN/Address: vcsa.int.aimless.jp
Please enter vCenter username: administrator@vsphere.local
Please enter vCenter password:
2022-07-08T17:38:27+09:00       INFO    Client Created with vcenter url: vcsa.int.aimless.jp
retrieving config
2022-07-08T17:38:27+09:00       INFO    vsphereProvider: createConfigHelper

Please select datacenter:
1) DC_aimless
Enter number: 1
You Selected: DC_aimless

Please select network:
1) VM Network
Enter number: 1
You Selected: VM Network
Do you want to configure Appliance for DHCP or Static IP deployment? Please select Y for DHCP and N for Static IP (y/n)?n
Please enter Static IP address prefix: 192.168.111.240/24 # この記載でデプロイできたが、本来は192.168.111.0/24 が正しい。
Please enter Static gateway: 192.168.111.254
Please enter DNS servers as a comma separated list: 192.168.111.248
The virtual machine hosting Appliance requires an IP range (minimum size of 2 addresses one for the VM, and the other IP is reserved for Appliance upgrade). Please specify the start range IP:192.168.111.238 # Resource Bridge が動作する CBL-Mariner 仮想マシン の NIC で利用
Please specify the end range IP:192.168.111.239
Please enter VLAN ID (leave blank if not needed):

Please select resourcepool:
1) Cluster01/Resources (Complete path - /DC_aimless/host/Cluster01/Resources)
Enter number: 1
You Selected: Cluster01/Resources (Complete path - /DC_aimless/host/Cluster01/Resources)

Please select datastore:
1) datastore1
2) NVMeDisk
Enter number: 2
You Selected: NVMeDisk

Please select folder:
1) HCI (Complete path - /DC_aimless/vm/HCI)
2) vCLS (Complete path - /DC_aimless/vm/vCLS)
3) Discovered virtual machine (Complete path - /DC_aimless/vm/Discovered virtual machine)
Enter number: 1
You Selected: HCI (Complete path - /DC_aimless/vm/HCI)
Please enter name of the VM template that will be created on your infrastructure: arcresourcebridge

Please provide Appliance cluster configuration
Please enter Appliance control plane IP: 192.168.111.237 # CBL-Mariner 内部で動作する Kubernetes の API エンドポイントで利用
Do you want to configure Appliance proxy settings? (y/n) n

All configuration files created successfully
Appliance Configuration YAML was created here: C:\Users\<YOUR-NAME>\Downloads\vm-resource-bridge\vcsa-home-appliance.yaml
Resource Configuration YAML was created here: C:\Users\<YOUR-NAME>\Downloads\vm-resource-bridge\vcsa-home-resource.yaml
Infrastructure Configuration YAML was created here: C:\Users\<YOUR-NAME>\Downloads\vm-resource-bridge\vcsa-home-infra.yamlコマンドが成功すると3つのファイルが生成されます。<NAME>-appliance.yaml がメインのファイルで、<NAME>-resource.yaml と <NAME>-infra.yaml を参照する形になっています。後続のコマンドでは --config-file オプションで <NAME>-appliance.yaml を指定します。
applianceClusterConfig:
  controlPlaneEndpoint: 192.168.111.237
applianceResourceFilePath: vcsa-home-resource.yaml
infrastructureConfigPath: vcsa-home-infra.yamlresource:
location: eastus
name: vcsa-home
resource_group: arc-validate
subscription: xxxxxxxx-xxxx-xxxx-xxxx-b91fff05677cvsphereprovider:
appliancevm:
vmtemplate: resourceBridge
datacenter: DC_aimless
datastore: NVMeDisk
disksizegib: 25
folder: /DC_aimless/vm/HCI
memorymib: 16384
network:
dnsservers:
- 192.168.111.248
gateway: 192.168.111.254
ipaddressprefix: 192.168.111.240/24
k8snodeippoolend: 192.168.111.239
k8snodeippoolstart: 192.168.111.238
segment: VM Network
numcpus: 4
resourcepool: /DC_aimless/host/Cluster01/Resourcesaz arcappliance prepare vmware
コンフィグファイルが用意できたら、az arcappliance prepare vmware を実行して ESXi 上に Resource Bridge 用仮想マシンを作る準備をします。このコマンドを実行すると、コマンドを実行している端末上に仮想マシンを作成するための OVA ファイルがダウンロードされます。そして、その OVF ファイルを利用して vSphere 上にテンプレートが作成されます。
> az arcappliance prepare vmware --config-file vcsa-home-appliance.yaml
Command group 'arcappliance prepare' is in preview and under development. Reference and support levels: https://aka.ms/CLI_refstatus
Please enter vCenter FQDN/Address: vcsa.int.aimless.jp
Please enter vCenter username: administrator@vsphere.local
Please enter vCenter password:
Preparing the appliance configuration...

2022-07-07T20:16:41+09:00       INFO    Client Created with vcenter url: vcsa.int.aimless.jp
2022-07-07T20:16:41+09:00       INFO    vsphereProvider: Image Client: Checking if a template is provisioned...
2022-07-07T20:16:41+09:00       INFO    ProvisionImage: Discovering image download information...
2022-07-07T20:16:42+09:00       INFO    ProvisionImage: Downloading and validating image...
session state saved to "C:\\Users\\<YOUR-NAME>\\AppData\\Local\\Temp\\kva703162653\\dsdk-701121496\\Linux-K8s-1.21.9-v193256.ova.json"
2022-07-07T20:23:39+09:00       INFO    vsphereProvider: Image Client Provision: Deploying the template...
2022-07-07T20:24:50+09:00       INFO    ImageProvision: VSphere: Template Deployed. Creating snapshot and finishing aftersteps....
2022-07-07T20:24:50+09:00       INFO    ImageProvision: VSphere: Image Provision is successful
Appliance configuration was prepared successfully

Prepared appliance for deployment!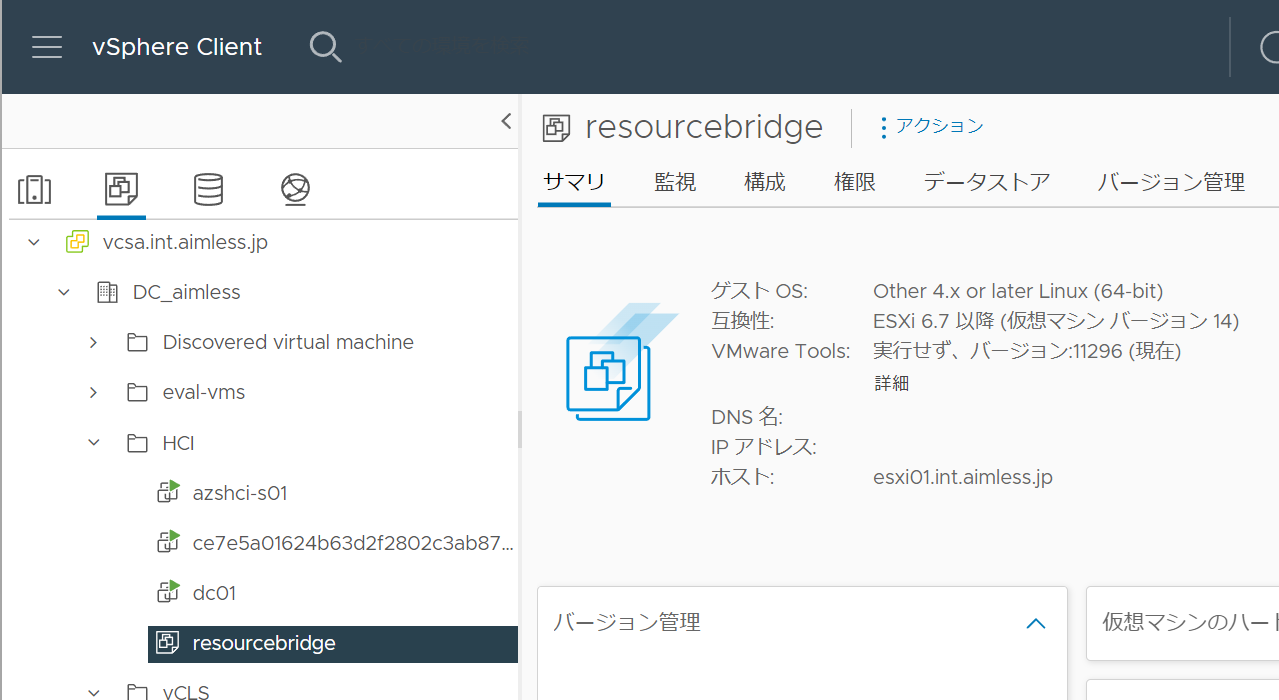
az arcappliance deploy vmware
テンプレートが用意できたら、az arcappliance deploy vmware を実行して Resource Bridge を構築します。
> az arcappliance deploy vmware --config-file vcsa-home-appliance.yaml
Command group 'arcappliance deploy' is in preview and under development. Reference and support levels: https://aka.ms/CLI_refstatus
Please enter vCenter FQDN/Address: vcsa.int.aimless.jp
Please enter vCenter username: administrator@vsphere.local
Please enter vCenter password:
Creating the appliance...

2022-07-07T21:02:47+09:00       INFO    Client Created with vcenter url: vcsa.int.aimless.jp
2022-07-07T21:02:47+09:00       INFO    vsphereProvider: Ensuring pre-requisites on vcenter for the appliance deployment
2022-07-07T21:02:47+09:00       INFO    REST Client Created with vcenter url: vcsa.int.aimless.jp
2022-07-07T21:02:47+09:00       INFO    virtual machine template for management appliance and it\'s snapshot already ready...
2022-07-07T21:02:50+09:00       INFO    vsphereProvider: CloudInit
2022-07-07T21:02:50+09:00       INFO    vsphereProvider: deployHelper
2022-07-07T21:02:50+09:00       INFO    vsphereProvider: deployHelper, Waiting for VM Clone...
2022-07-07T21:02:51+09:00       INFO    vsphereProvider: Turning on VM...
2022-07-07T21:02:51+09:00       INFO    vsphereProvider: Waiting for VM to get IP...
2022-07-07T21:03:15+09:00       INFO    Received IP address: 192.168.111.238
2022-07-07T21:03:15+09:00       INFO    core: Waiting for API server...
2022-07-07T21:04:05+09:00       INFO    core: Waiting for pod 'Cloud Operator' to be ready...
2022-07-07T21:23:46+09:00       INFO    core: Waiting for pod 'Cluster API core' to be ready...
{
"errorCode": "KvaTimeoutError",
"errorResponse": "{\n\"message\": \"Appliance Deploy timed out\"\n}"
}
仮想マシンは起動してきました。ですが、コマンドが期待する待ち時間にすべての作業が終わらなかったようで、コマンドがタイムアウトで失敗になってしまいました。
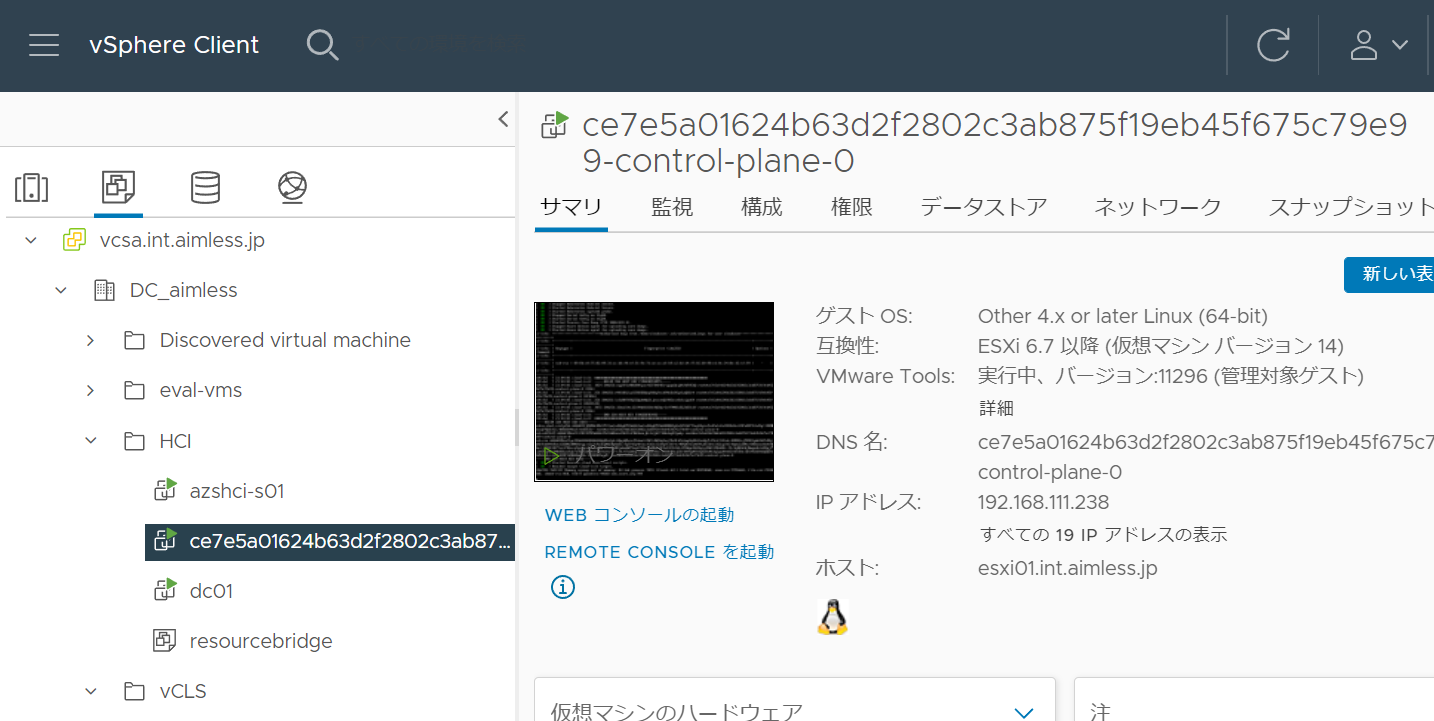
しばらく放置した後に Resource Bridge 用仮想マシン内の k8s 上の Pod を確認した結果、ほぼすべての Pod がすべて Running になっていたので先に進むことにしました。本番環境でコマンドが失敗した場合は、サポートに問い合わせましょう。
> kubectl get pod -A
NAMESPACE                           NAME                                                                                    READY   STATUS     RESTARTS   AGE
azure-arc                           alertmanager-azure-arc-monitoring-alertmanager-0                                        3/3     Running    0          93m
azure-arc                           appliance-connect-agent-6f88f9ccc4-xmk6t                                                2/2     Running    0          96m
azure-arc                           azure-arc-monitoring-kube-state-metrics-9c5568bd-gh4g4                                  1/1     Running    0          93m
azure-arc                           azure-arc-monitoring-operator-56db4569f-pnkt4                                           1/1     Running    0          93m
azure-arc                           azure-arc-monitoring-prometheus-node-exporter-vqscb                                     1/1     Running    0          93m
azure-arc                           clusterconnect-agent-5b5cf599db-6cwpp                                                   3/3     Running    3          96m
azure-arc                           clusteridentityoperator-5fcdc695d6-c8wcx                                                2/2     Running    0          96m
azure-arc                           config-agent-789885db48-mm78w                                                           1/2     Running    0          96m
azure-arc                           extension-manager-776947bbb8-g8jdv                                                      2/2     Running    0          96m
azure-arc                           guard-7594496c6b-c8lh2                                                                  0/2     Init:0/1   0          96m
azure-arc                           metrics-agent-58586fc7dc-5pdl5                                                          2/2     Running    0          96m
azure-arc                           prometheus-azure-arc-monitoring-prometheus-0                                            3/3     Running    0          93m
azure-arc                           resource-sync-agent-c56cb8c57-ssgsm                                                     2/2     Running    0          96m
capi-kubeadm-bootstrap-system       capi-kubeadm-bootstrap-controller-manager-59b45d75f7-pzktr                              2/2     Running    0          96m
capi-kubeadm-control-plane-system   capi-kubeadm-control-plane-controller-manager-5cbc779d84-6r7f6                          2/2     Running    0          96m
capi-system                         capi-controller-manager-6d8d9c98b7-t8dgl                                                2/2     Running    0          96m
capv-system                         capv-controller-manager-74f956c99-grw47                                                 3/3     Running    0          96m
capv-system                         capv-static-ip-controller-manager-8559c8997b-qjzhg                                      2/2     Running    0          101m
capv-system                         ipam-controller-manager-5957f5bb84-wdpcx                                                1/1     Running    0          101m
cert-manager                        cert-manager-7c74b5d568-wf7hc                                                           1/1     Running    0          102m
cert-manager                        cert-manager-cainjector-647bc55979-ggpfc                                                1/1     Running    0          102m
cert-manager                        cert-manager-webhook-6f69754dcd-8hdbs                                                   1/1     Running    0          102m
cloudop-system                      cloudop-controller-manager-574684d6d4-jrcsl                                             1/1     Running    0          101m
kube-system                         calico-kube-controllers-59fcc878bb-k9gkm                                                1/1     Running    0          96m
kube-system                         calico-node-zjklr                                                                       1/1     Running    0          10h
kube-system                         calico-patch-4h8pn                                                                      1/1     Running    0          96m
kube-system                         calicoctl                                                                               1/1     Running    0          101m
kube-system                         coredns-7489c675f5-6nbp6                                                                1/1     Running    0          101m
kube-system                         coredns-7489c675f5-b9hdg                                                                1/1     Running    0          101m
kube-system                         etcd-ce7e5a01624b63d2f2802c3ab875f19eb45f675c79e99-control-plane-0                      1/1     Running    0          101m
kube-system                         kube-apiserver-ce7e5a01624b63d2f2802c3ab875f19eb45f675c79e99-control-plane-0            1/1     Running    0          101m
kube-system                         kube-controller-manager-ce7e5a01624b63d2f2802c3ab875f19eb45f675c79e99-control-plane-0   1/1     Running    0          101m
kube-system                         kube-proxy-kwstx                                                                        1/1     Running    0          101m
kube-system                         kube-scheduler-ce7e5a01624b63d2f2802c3ab875f19eb45f675c79e99-control-plane-0            1/1     Running    0          101m
kube-system                         kube-vip-ce7e5a01624b63d2f2802c3ab875f19eb45f675c79e99-control-plane-0                  1/1     Running    0          101m
kube-system                         vsphere-cloud-controller-manager-svp55                                                  1/1     Running    0          97m
Resource Bridge 上の k8s にアクセスするためには、コマンドを実行した端末の c:\programData\kva 配下に保存されている kubeconfig を利用します。このフォルダには、kubeconfig だけでなく Resource Bridge 用仮想マシンに SSH 接続するためのキーペアも保存されています。これらのファイルはデプロイ後の運用でも利用しますので、安全な場所に保管しておきましょう。
PS C:\ProgramData> Get-ChildItem .\kva\ -Recurse

    Directory: C:\ProgramData\kva

Mode                 LastWriteTime         Length Name
----                 -------------         ------ ----
d----          2022/07/07    19:09                .ssh
-a---          2022/07/07    21:03           7359 kubeconfig
-a---          2022/07/08    17:38        2012995 kva.log

    Directory: C:\ProgramData\kva\.ssh

Mode                 LastWriteTime         Length Name
----                 -------------         ------ ----
-a---          2022/07/07    19:09           1675 logkey
-a---          2022/07/07    19:09            381 logkey.pub
az arcappliance create vmware
そして、作成された Resource Bridge を Azure に登録します。az arcappliance create vmware を実行することで、Azure ポータル上に Resource Bridge が出現します。
>az arcappliance create vmware --config-file vcsa-home-appliance.yaml `
  --kubeconfig C:\ProgramData\kva\kubeconfig

Command group 'arcappliance create' is in preview and under development. Reference and support levels: https://aka.ms/CLI_refstatus
{
  "distro": "AKSEdge",
  "id": "/subscriptions/xxxxxxxx-xxxx-xxxx-xxxx-xxxxxxxxxxxx/resourcegroups/arc-validate/providers/microsoft.resourceconnector/appliances/vcsa-home",
  "identity": {
    "principalId": "xxxxxxxx-xxxx-xxxx-xxxx-xxxxxxxxxxxx",
    "tenantId": "xxxxxxxx-xxxx-xxxx-xxxx-xxxxxxxxxxxx",
    "type": "SystemAssigned"
  },
  "infrastructureConfig": {
    "provider": "VMWare"
  },
  "location": "eastus",
  "name": "vcsa-home",
  "provisioningState": "Succeeded",
  "publicKey": "<DELETED>",
  "resourceGroup": "arc-validate",
  "status": "WaitingForHeartbeat",
  "systemData": "<DELETED>",
  "tags": null,
  "type": "Microsoft.ResourceConnector/appliances",
  "version": null
}
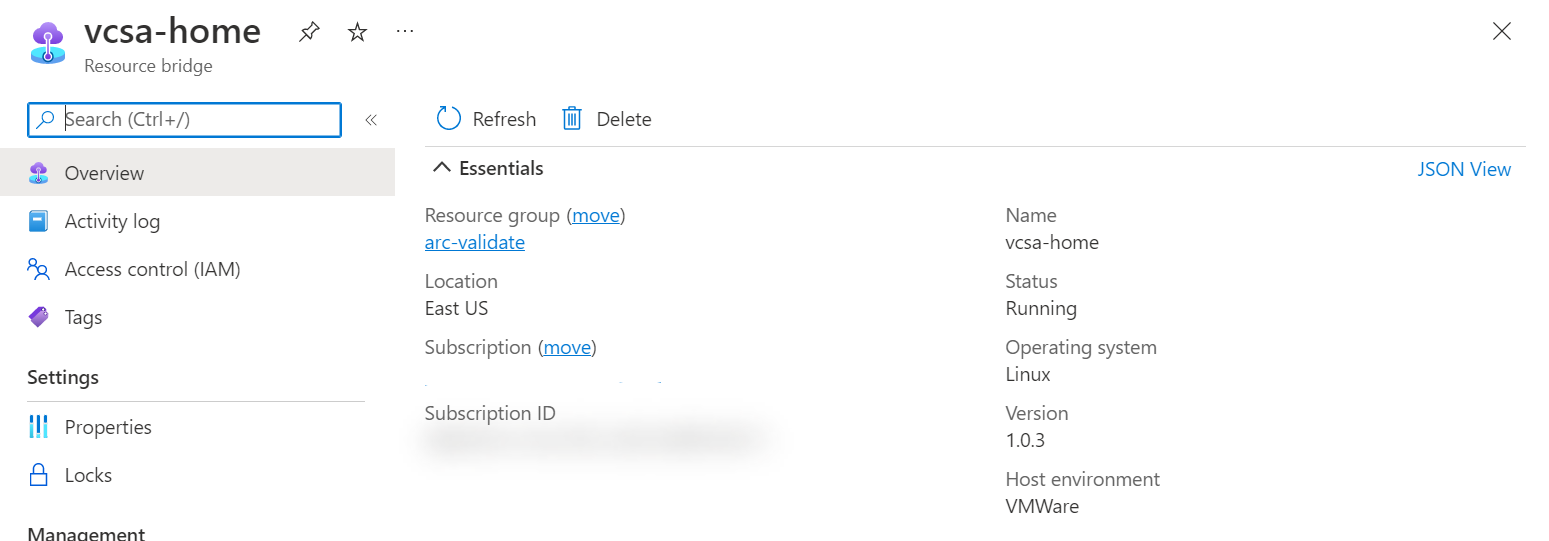
コマンドを実行した直後は、status が WaitingForHeartbeat になっています。このステータスが Running になるまでしばし待ちます。
拡張機能のインストール
できあがった Resource Bridge に対して vSphere と連携するための拡張機能をインストールします。
> $applianceSubscriptionId = "xxxxxxxx-xxxx-xxxx-xxxx-xxxxxxxxxxxx"
> $applianceResourceGroupName = "arc-validate"
> $applianceName = "vcsa-home"
> $VMW_RP_OBJECT_ID = (az ad sp show --id 'ac9dc5fe-b644-4832-9d03-d9f1ab70c5f7' --query id -o tsv)
>
> az k8s-extension create --debug --subscription $applianceSubscriptionId `
    --resource-group $applianceResourceGroupName --name azure-vmwareoperator `
    --extension-type 'Microsoft.vmware' --scope cluster --cluster-type appliances `
    --cluster-name $applianceName `
    --config Microsoft.CustomLocation.ServiceAccount=azure-vmwareoperator `
    --config global.rpObjectId="$VMW_RP_OBJECT_ID"

{
  "aksAssignedIdentity": null,
  "autoUpgradeMinorVersion": true,
  "configurationProtectedSettings": {},
  "configurationSettings": {
    "Microsoft.CustomLocation.ServiceAccount": "azure-vmwareoperator",
    "global.rpObjectId": "46b1b4eb-ab16-4ce8-aa55-096807312417"
  },
  "customLocationSettings": null,
  "errorInfo": null,
  "extensionType": "microsoft.vmware",
  "id": "/subscriptions/xxxxxxxx-xxxx-xxxx-xxxx-xxxxxxxxxxxx/resourceGroups/arc-validate/providers/Microsoft.ResourceConnector/appliances/vcsa-home/providers/Microsoft.KubernetesConfiguration/extensions/azure-vmwareoperator",
  "identity": null,
  "name": "azure-vmwareoperator",
  "packageUri": null,
  "provisioningState": "Succeeded",
  "releaseTrain": "Stable",
  "resourceGroup": "arc-validate",
  "scope": {
    "cluster": {
      "releaseNamespace": "azure-vmwareoperator"
    },
    "namespace": null
  },
  "statuses": "<DELETED>",
  "systemData": "",
  "type": "Microsoft.KubernetesConfiguration/extensions",
  "version": "1.0.39"
}
拡張機能をインストールすると、Resource Bridge 内の k8s に Pod が増えます。
> .\kubectl.exe get pod -A --kubeconfig 'C:\ProgramData\kva\kubeconfig'
NAMESPACE                           NAME                                                                                    READY   STATUS              RESTARTS   AGE
(中略)
azure-arc                           prometheus-azure-arc-monitoring-prometheus-0                                            3/3     Running             0          5h22m
azure-arc                           resource-sync-agent-c56cb8c57-ssgsm                                                     2/2     Running             0          5h24m
azure-vmwareoperator                vmware-operator-manager-676c857d84-swbj2                                                1/1     Running             0          20m # 増えた Pod
capi-kubeadm-bootstrap-system       capi-kubeadm-bootstrap-controller-manager-59b45d75f7-pzktr                              2/2     Running             0          5h24m
capi-kubeadm-control-plane-system   capi-kubeadm-control-plane-controller-manager-5cbc779d84-6r7f6                          2/2     Running             0          5h24m
カスタムロケーションの作成
そのうえで、Resource Bridge と連携する vSphere 環境を Azure リージョンのように見せるために、カスタムロケーションを作成します。日本にある自宅の環境なので japanhome という名前にしました。
> $clusterExtensionId = (az k8s-extension show --subscription $applianceSubscriptionId `
  --resource-group $applianceResourceGroupName --name azure-vmwareoperator --cluster-type appliances --cluster-name $applianceName --query id -o tsv)
>
> $applianceId = (az arcappliance show --subscription $applianceSubscriptionId `
  --resource-group $applianceResourceGroupName --name $applianceName --query id -o tsv)
WARNING: Command group 'arcappliance' is in preview and under development. Reference and support levels: https://aka.ms/CLI_refstatus
>
> $customLocationNamespace = ("$customLocationName".ToLower() -replace '[^a-z0-9-]', '')
>
> $applianceId = (az arcappliance show --subscription $applianceSubscriptionId `
  --resource-group $applianceResourceGroupName --name $applianceName --query id -o tsv)
WARNING: Command group 'arcappliance' is in preview and under development. Reference and support levels: https://aka.ms/CLI_refstatus
>
> $customLocationSubscriptionId = $applianceSubscriptionId
> $customLocationResourceGroupName = $applianceResourceGroupName
> $customLocationName = "japanhome"
> $location = "eastus"
> $customLocationNamespace = ("$customLocationName".ToLower() -replace '[^a-z0-9-]', '')
>
> az customlocation create --debug --tags "" --subscription $customLocationSubscriptionId `
  --resource-group $customLocationResourceGroupName --name $customLocationName `
  --location $location --namespace $customLocationNamespace `
  --host-resource-id $applianceId --cluster-extension-ids $clusterExtensionId

{
  "authentication": {
    "type": null,
    "value": null
  },
  "clusterExtensionIds": [
    "/subscriptions/xxxxxxxx-xxxx-xxxx-xxxx-xxxxxxxxxxxx/resourceGroups/arc-validate/providers/Microsoft.ResourceConnector/appliances/vcsa-home/providers/Microsoft.KubernetesConfiguration/extensions/azure-vmwareoperator"
  ],
  "displayName": "japanhome",
  "hostResourceId": "/subscriptions/xxxxxxxx-xxxx-xxxx-xxxx-xxxxxxxxxxxx/resourcegroups/arc-validate/providers/microsoft.resourceconnector/appliances/vcsa-home",
  "hostType": "Kubernetes",
  "id": "/subscriptions/xxxxxxxx-xxxx-xxxx-xxxx-xxxxxxxxxxxx/resourcegroups/arc-validate/providers/microsoft.extendedlocation/customlocations/japanhome",
  "identity": null,
  "location": "eastus",
  "name": "japanhome",
  "namespace": "japanhome",
  "provisioningState": "Succeeded",
  "resourceGroup": "arc-validate",
  "systemData": "<DELETED>",
  "tags": null,
  "type": "Microsoft.ExtendedLocation/customLocations"
}
vCenter の接続
最後に az connectedvmware vcenter connect で vCenter を Azure に接続します。
> $customLocationId = (az customlocation show --subscription $customLocationSubscriptionId `
--resource-group $customLocationResourceGroupName --name $customLocationName --query id -o tsv)
>
> $vCenterSubscriptionId = $applianceSubscriptionId
> $vCenterResourceGroupName = $applianceResourceGroupName
> $vCenterName = "vcsa.int.aimless.jp"
> $location = "eastus"
> az connectedvmware vcenter connect --debug --tags "" --subscription $vCenterSubscriptionId `
--resource-group $vCenterResourceGroupName --name $vCenterName `
--custom-location $customLocationId --location $location --port 443
>
{
"connectionStatus": "Connected",
"credentials": {
"password": null,
"username": "administrator@vsphere.local"
},
"customResourceName": "78697eda-4eb8-4b18-8d5a-7b1ecbf05e59",
"extendedLocation": {
"name": "/subscriptions/xxxxxxxx-xxxx-xxxx-xxxx-xxxxxxxxxxxx/resourcegroups/arc-validate/providers/microsoft.extendedlocation/customlocations/japanhome",
"type": "CustomLocation"
},
"fqdn": "vcsa.int.aimless.jp",
"id": "/subscriptions/xxxxxxxx-xxxx-xxxx-xxxx-xxxxxxxxxxxx/resourceGroups/arc-validate/providers/Microsoft.ConnectedVMwarevSphere/vcenters/vcsa.int.aimless.jp",
"instanceUuid": "d65ce80e-1ec6-4b38-8d31-f0d54b112c9c",
"kind": "VMware",
"location": "eastus",
"name": "vcsa.int.aimless.jp",
"port": 443,
"provisioningState": "Succeeded",
"resourceGroup": "arc-validate",
"statuses": [
{
"lastUpdatedAt": "2022-07-08T04:44:21+00:00",
"message": null,
"reason": null,
"severity": null,
"status": "True",
"type": "Connected"
},
{
"lastUpdatedAt": "2022-07-08T04:44:29.662588+00:00",
"message": null,
"reason": null,
"severity": null,
"status": "True",
"type": "Ready"
},
{
"lastUpdatedAt": "2022-07-08T04:44:29.662588+00:00",
"message": null,
"reason": null,
"severity": null,
"status": "True",
"type": "Idle"
}
],
"systemData": "<DELETED>",
"tags": {},
"type": "microsoft.connectedvmwarevsphere/vcenters",
"uuid": "78697eda-4eb8-4b18-8d5a-7b1ecbf05e59",
"version": "7.0.3"
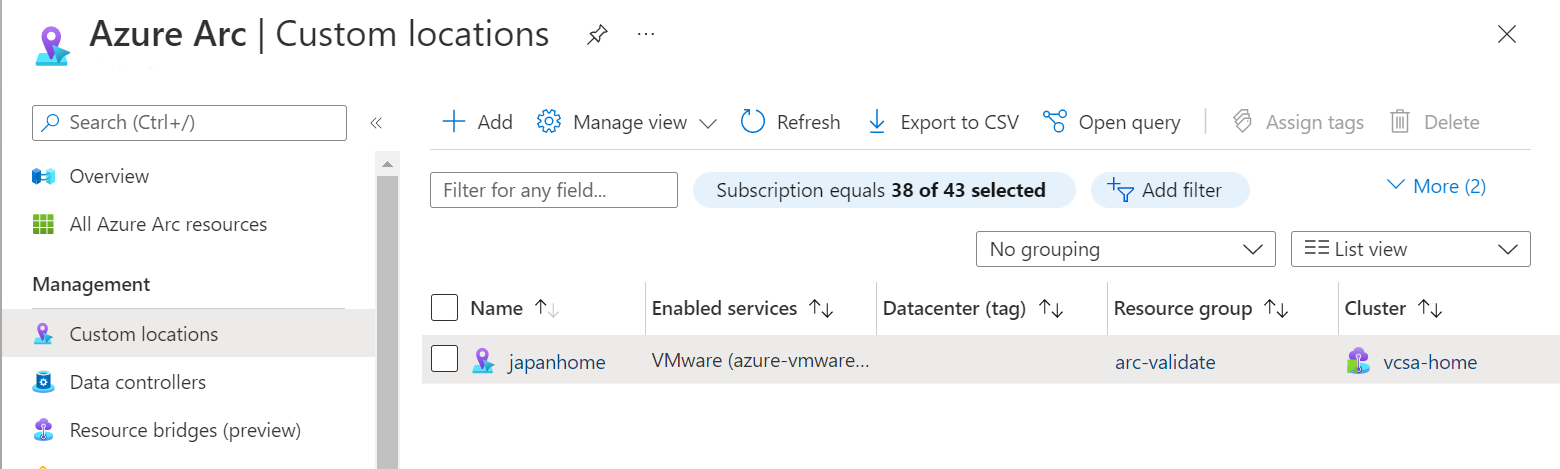
}接続が完了すると、Azure Portal に vCenter が出現します。準備完了です。

まとめ
Azure Portal が生成するスクリプトを使わずに、あえて手作業で Azure Arc Resource Bridge を VMware vSphere 環境にデプロイしてみました。スクリプトに任せるのも良いですが、ステップバイステップで作業をすると理解が深まります。あえて手作業でやってみるのも悪くないですね。